
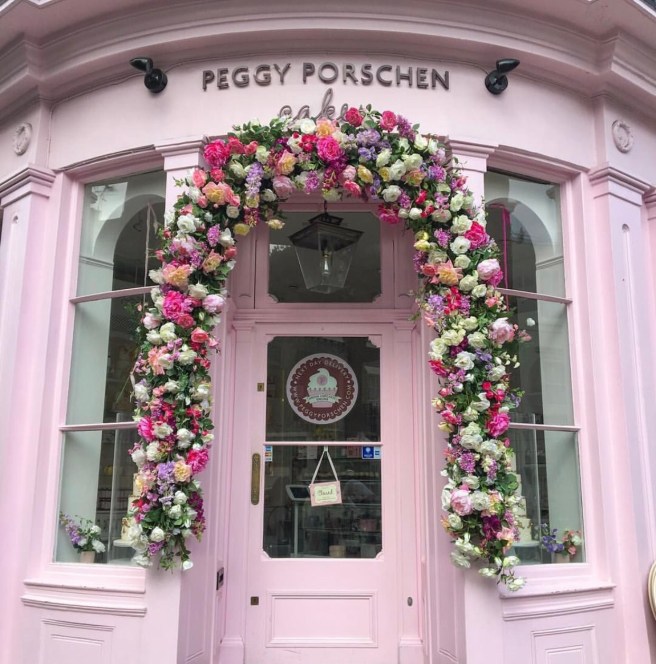
Who in the world is Peggy Porschen, you ask? She’s an award winning cake designer in London, whose cake shop in Belgravia features stunning seasonal floral installations like this one:
To make a long story short, a good friend of ours was planning a surprise 40th birthday party for his wife, Jennifer, who had been dreaming of throwing a dramatic color-themed party with flowers, “Just like Peggy Porschen!”
Jeremy, clever husband that he is, decided to take all of Jennifer’s own ideas and use them for her surprise party… but he needed some help with the giant flower installations, and that’s when I got the email: ever heard of Peggy Porschen?
And, I had! I fell in love with their whimsical shop when we were planning our trip to London last year.
So, I started a little research, and honestly, I did not find any great tutorials or construction ideas out there. In the end, I came up with my own plan (which I’ll include at the end, for those who are interested). I used mostly faux flowers ordered online, plus some cast-offs I was able to gather from local friends.


In addition to the flowers, brightly colored Chinese lanterns peppered the ceiling, the caterer planned a menu of bold colors and flavors, and party guests themselves were asked to wear colorful attire. Such a great antidote to our dreary New England winter!
It was quite a job getting Jennifer out of her own house all afternoon to set up, but Jeremy managed it, with the help of her sisters, and she came home to a house full of friends, good food, and flowers!
Read on for the flower tutorial, if you’re so inclined…
Step 1: Plan + Measure
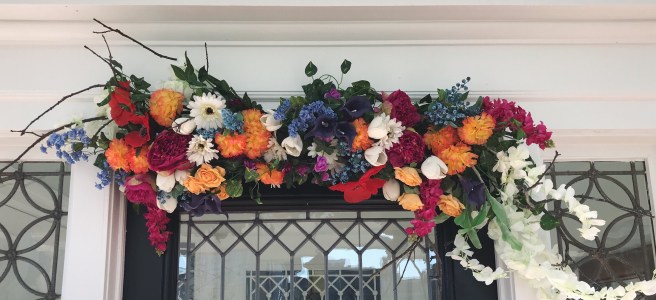
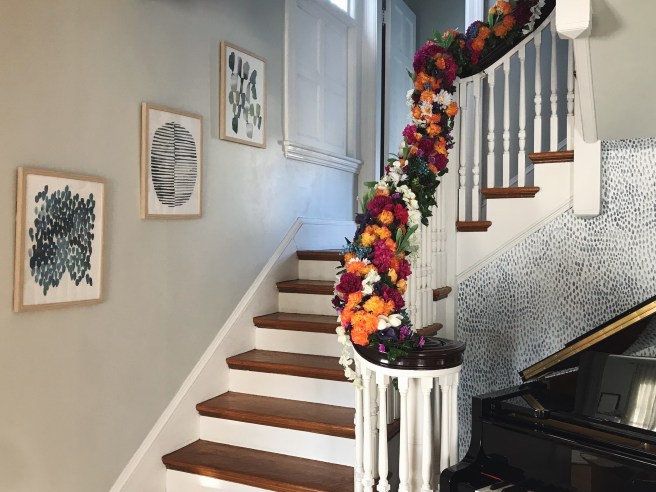
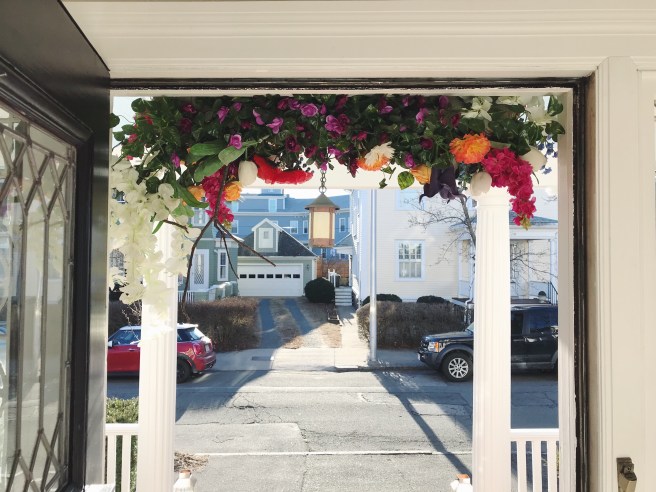
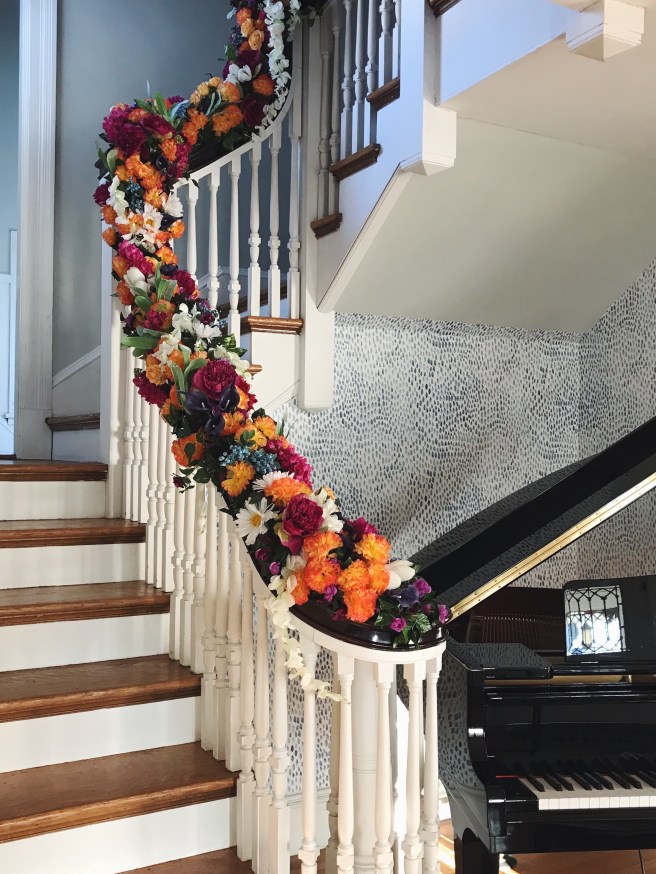
First, I decided to create an asymmetrical floral swag over Jeremy and Jennifer’s front door and a long garland down the dramatic staircase in their foyer. Jeremy surreptitiously took measurements of everything a couple weeks in advance.
- 40″ Door Swag
- 9′ Banister Garland
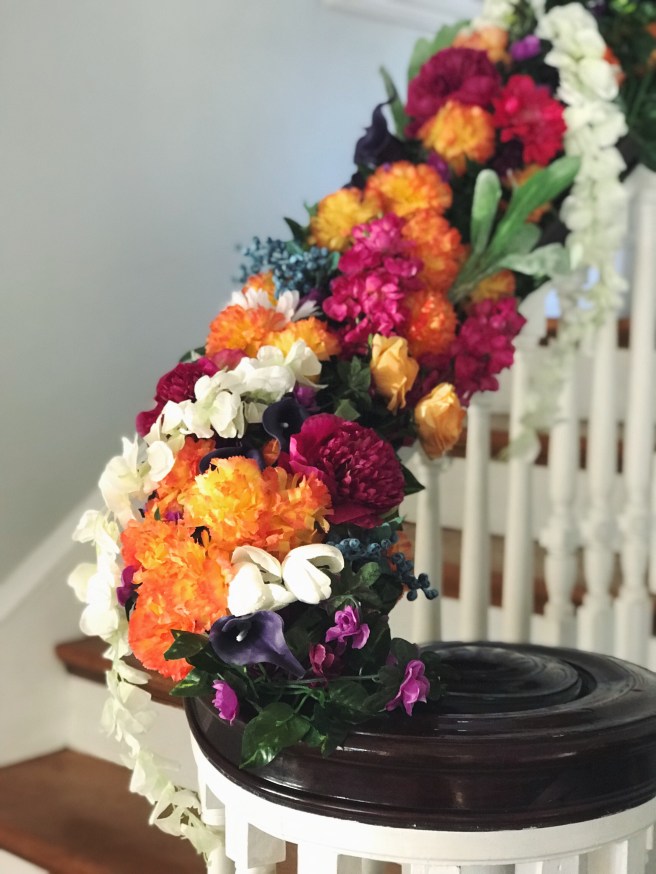
Jeremy also shared a very specific color palate of jewel tones that Jennifer loves, and which coordinate with their home’s design, so I planned to stick to this limited range: bright red/magenta, muted yellow, orange, dark purple, and dusty blue, plus white to break it up.
Step 2: Supplies
I spent WAY too much time researching faux flowers online. I looked for good reviews on quality, realistic look/texture, and availability in larger bunches. I also made sure to get a variety of sizes for visual interest. Linking to everything I ordered below.
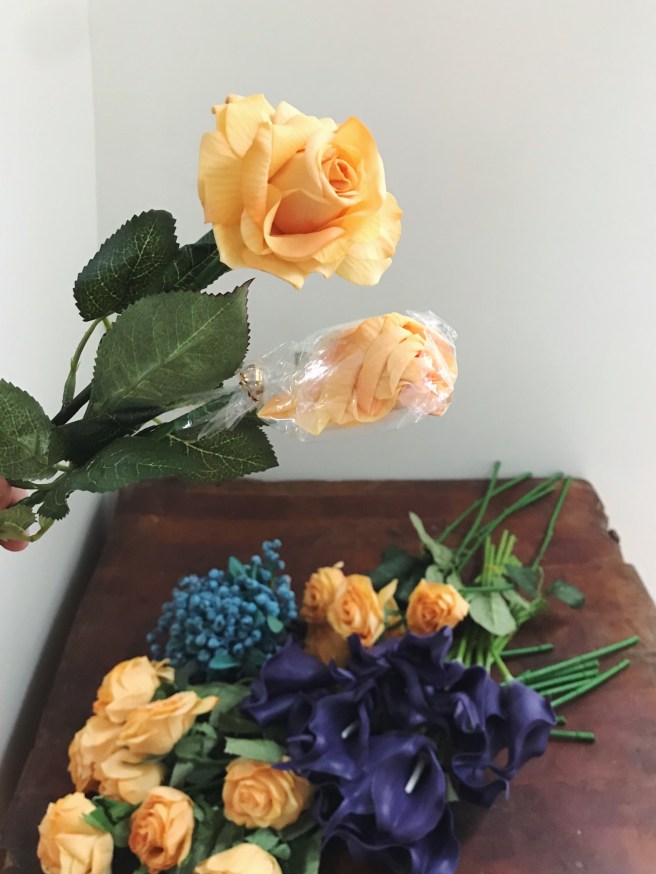
They arrived in various states, from squashed to smelly, so a little fluffing and airing out was necessary.
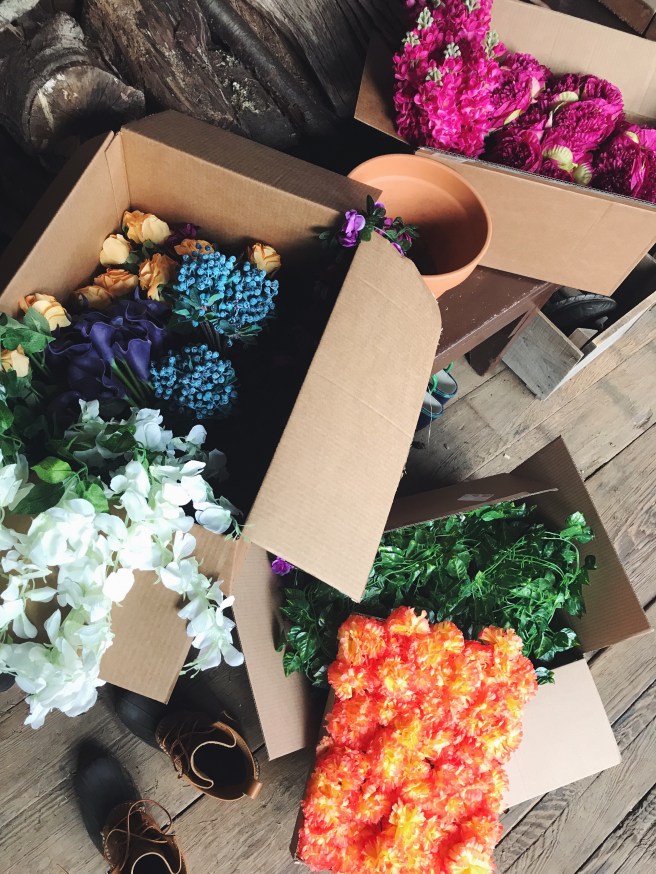
Here’s what I ordered:
- Lvydec Vintage Peony* (two 2 packs, 20 stems)
- Lily Garden Snapdragon, hot pink (two packs, 12 stems)
- Mistari Blueberries (one pack, 20 stems)
- Real Touch Silk Rose, yellow (two packs, 20 stems)
- Duovlo Latex Real Touch Calla Lily* (one pack, 20 stems)
- Unomor Hanging Wisteria, white (one pack, 8 stems)
- Larksilk Carnation* (one pack, 100 stems)
- Cewor Artificial Ivy C (one pack, 24 strands)
- Miracliy Rose Vine, purple (two packs, 10 strands)
*The color I used is sold out, so I’m linking to the same product in another color.
In addition to these, I mixed in a few silk tulips and poppies and a handful of other random stems shared by folks from our local “Buy Nothing” Facebook group.
Next, construction materials:
- Dry floral foam blocks
- Mesh burlap
- Floral wire
- Measuring tape
- Scissors and/or wire cutters
- Sharp knife
- Branches/twigs
Step 3: Construction
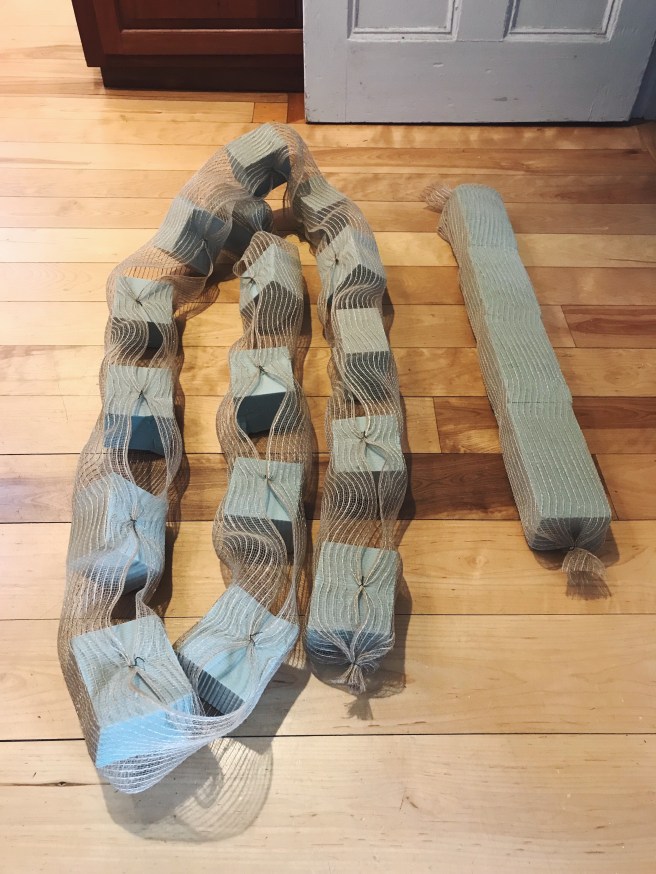
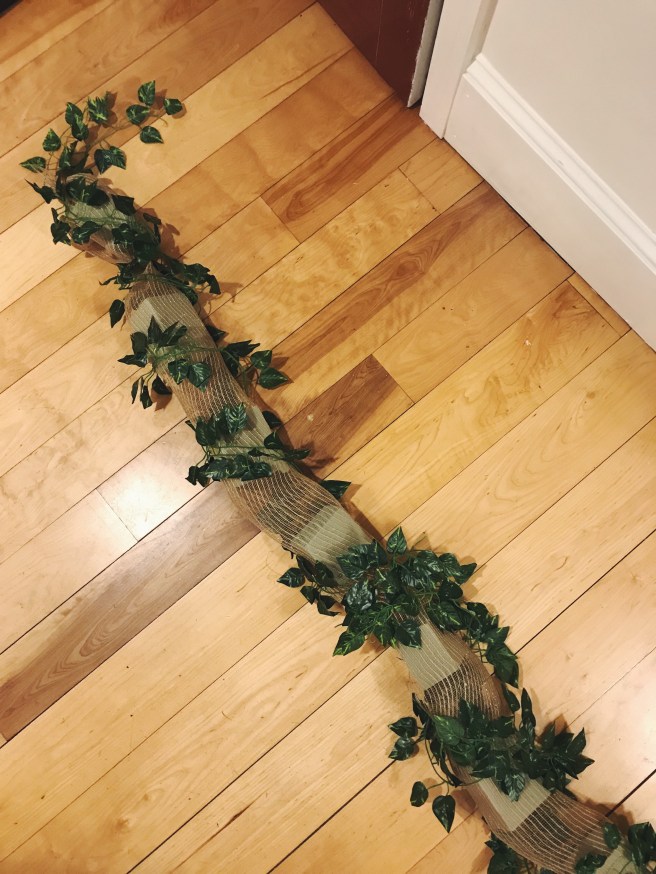
For the garland, I sliced the foam blocks in half and did a little math to figure out how much space I’d need in between each block to make up the full length of the staircase — in this case, 5 inches between blocks. The space in between would allow it to bend with the curves of the railing.


I rolled out my burlap the full 9 feet, then started at one end wrapping each block, securing the burlap with a bit of wire, measuring 5 inches, and placing the next one.
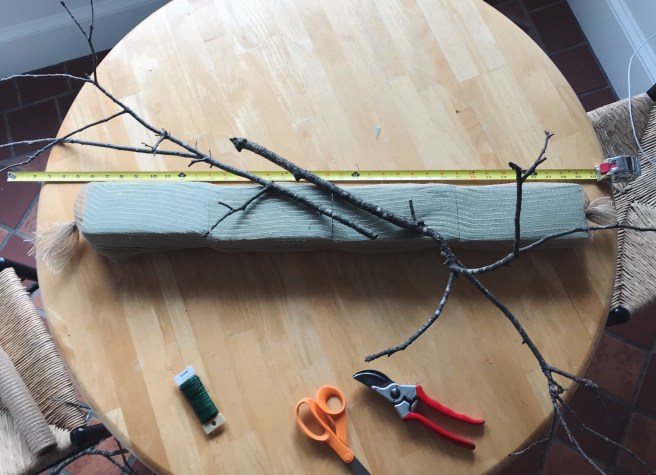
For the door swag, I grouped 4 flower foam blocks end to end and wrapped them in burlap. Then, I used more wire to attach two branches to form the basic asymmetrical shape.
Step 4: Adding the Green Base
For the garland, I gathered lengths of ivy greenery in bunches of 3 and wound them around and around, securing with wire shaped into “pins” and stuck directly into the floral foam. I left a bit loose at either end, so the garland wouldn’t have an abrupt, cut-off look. Then I did the same with the purple rose garlands, in order to get pretty good coverage over the entire length.
For the door swag, I zigzagged the greens across the whole surface, and again secured them with wire.
Step 5: Adding the Flowers
I added flowers to the door swag first, to be sure I had enough, sticking them right into the floral foam.
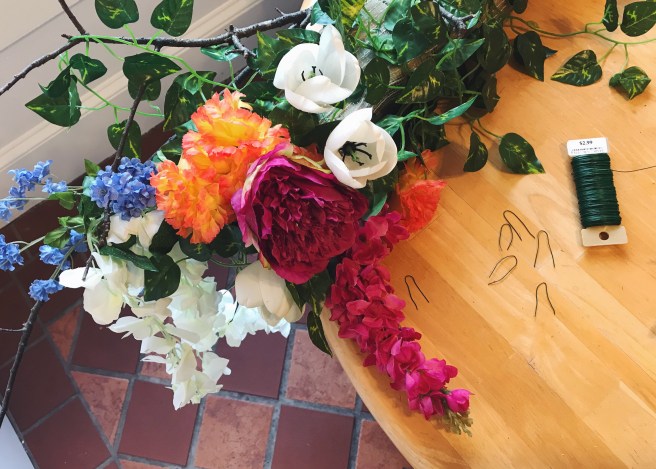
Then, I took all the remaining flowers, and laid them out next to the garland to help make sure I’d be spacing them evenly along the entire length.

Step 6: Install
I used more floral wire to attach the garland at several points along the banister, especially at the turns. I also used wire for the door swag, hanging it from a couple nails just above the trim.
I held back a few flowers and some of the purple rose garland to fill in if needed after I installed everything — and I used every bit of those extras! The way the swag hung down over the door frame left a view of the bare floral foam from inside the foyer, which I needed to fill once it was in place.
So happy with the results! (And the birthday girl was delighted, too!)

Gorgeous, Caroline. You are so talented! And I am glad to learn about Peggy Porschen, too.
LikeLike